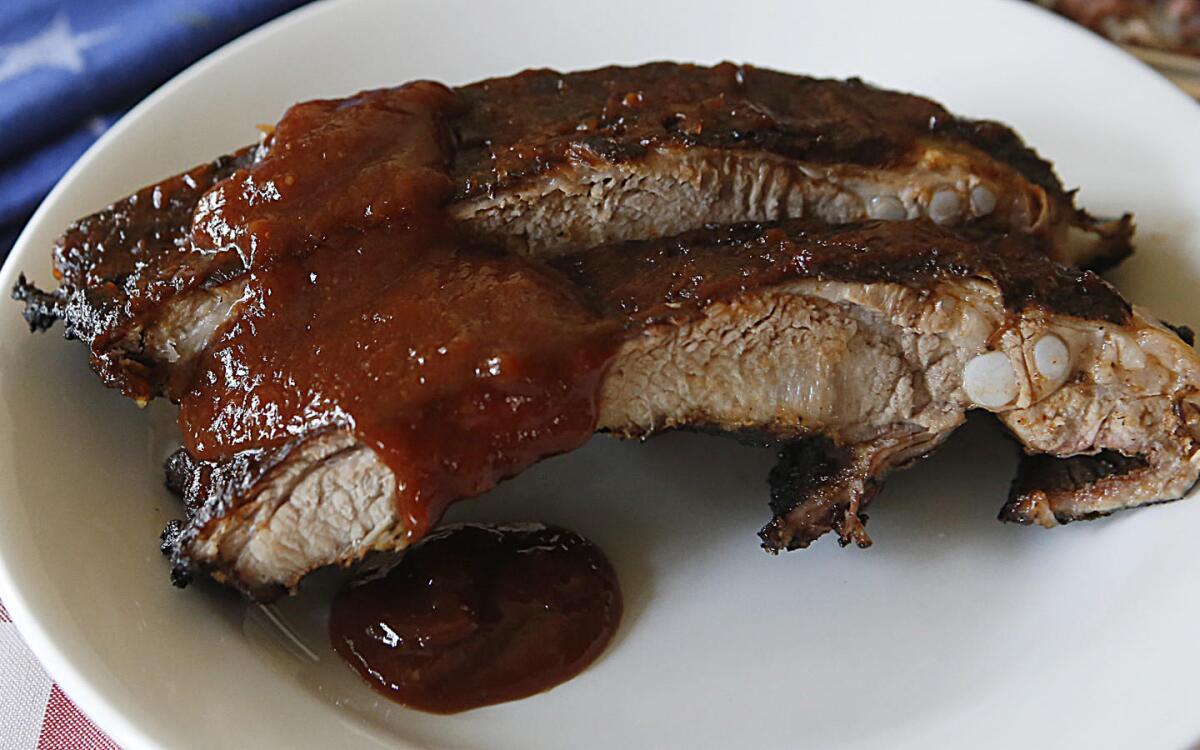
Hickory-smoked spare ribs
- Share via
If there’s one dish that signifies summer in America, it’s ribs. Cooked outdoors in backyards across this great nation, ribs are a cherished pastime. They are the stuff of smoke and live fire, and the glory of long afternoons spent in lawn chairs with cold beers. Passionate cooks keep a careful eye, periodically basting a little here or prodding there, as a hungry audience of family and friends watches the artistry unfold.
“It’s an indigenous American food,” argues Meathead Goldwyn, founder of the popular website AmazingRibs.com and author of “Meathead: The Science of Great Barbecue and Grilling.” The way we cook ribs, and the sauces we use, are original to America.
Simple as ribs may appear, there is an art to mastering them, as anyone from a weekend warrior to champion pit master can attest. “The reason they have all these festivals and barbecue cook-offs all around the country — the reason for the fanfare — is that ribs are really quite detailed,” says Curtis Stone, chef-owner of the Los Angeles restaurants Maude and Gwen, the latter of which includes an in-house butcher shop. “If you want to do it right, ribs take time. And skill.”
Stroll the meat display in your local butcher shop or supermarket, and the sheer variety of rib choices can be daunting. In addition to the various cuts of pork ribs, you might find large beef ribs or even racks of lamb ribs vying for attention. But pork is by far the most popular.
“When you say ribs, almost everybody thinks you’re talking about pork ribs,” says Goldwyn. “They seem to be the holy grail.” Part of the fascination with pork, Goldwyn argues, is the presentation. Most Americans associate barbecue with pork ribs slathered with that incredibly rich, sweet, tomato-based Kansas City-style barbecue sauce.
Types of ribs
All ribs, regardless of the cut, come from the rib cage of the animal. This is a tough cut of meat, coming from muscles around the bone that are used for locomotion and to also hold the rib cage together.
Andrew Sutton, butcher at Gwen Butcher Shop & Restaurant in Hollywood, with an entire side of ribs before breaking them down.
Andrew Sutton, butcher at Gwen Butcher Shop & Restaurant in Hollywood, with an entire side of ribs before breaking them down. (Myung J. Chun / Los Angeles Times)
The cut known as “baby backs” come from the top of the ribs, nearest the spine, and lie just below the loin muscle. The bones are slightly curved, with most of the meat on top of the ribs.
“Baby backs are beginner ribs,” said Stone. “They’re probably the most common because they’re easy to cook.” They also tend to be the more expensive because they consist of loin meat, which sits higher on the hog and tends to be leaner and initially more tender than lower cuts.
The racks generally tend to be smaller than other racks, and the amount of meat will vary depending on how the butcher cuts the rack from the loin, usually a half-inch or so of meat. If you buy a loin roast, you’ll get a slab of baby backs underneath it. For a meatier rack of baby backs, sometimes you can ask your butcher to cut the slab off the roast. “This way you’ve got your baby backs and a bonus pork loin roast,” Goldwyn says.
Because the meat comes from the loin, baby backs tend to cook more quickly than other ribs. They also have a tendency to dry out more quickly if you’re not careful.
As you move down the rib cage, extending around the chest to the stomach, you’ll find the spare ribs. These are larger ribs, with the meat situated between the bones rather than on top, and there’s a lot more marbling and connective tissue. Because of this, spare ribs take longer to cook than baby backs, but cook up more tender and have more flavor.
“I probably only cook spare ribs,” said Sylvie Curry, a champion pit master on the competition barbecue circuit. In competition, she notes people cook spare ribs because there is more marbling and more moisture in the meat.
Where baby backs are a clean, rectangular cut, spare ribs are oddly shaped, owing to a strip of cartilage, fat and connective tissue called “rib tips” or “brisket” (pork brisket is not the same as beef brisket) attached at one end. Along with baby backs, this is probably the most common cut of pork ribs in Southern California. However, in many places, the tips are removed to create what is called a “center cut” or “St. Louis cut.” A rack of center-cut ribs is sometimes referred to as “mock baby backs” because of the rectangular shape of the rack.
A good butcher will trim or “clean” a rack of spare ribs for you, removing the rib tips. It’s also easy to do yourself at home. If you do remove them, save the tips. They’re loaded with flavor and moisture. Cook them with your center rack, keeping in mind that the tips will be done faster given their size. Then chop them up, toss them with a little sauce if you’d like, and serve as an appetizer while the guests are waiting for the center rack to finish.
With any rack, remove the membrane on the underside of the ribs, next to the bone. As it cooks, the membrane becomes rubbery and chewy. You can ask your butcher to remove it or peel the membrane away yourself using a butter knife.
Depending on the region or ethnic market of a particular area, you might also find other cuts labeled as ribs. One common cut is “country ribs.” These are not true ribs but include meat from the shoulder or blade of the pig. It’s a fatty cut and also very flavorful. Country ribs are usually sold boneless and are cut into rib-shaped pieces.
Cooking: Rib science
Before cooking ribs, it’s important to season them. While you’ll see complex rubs, bastes and sauces used on competition shows, ribs don’t have to be that elaborate. “When I’m cooking at home, sometimes I don’t even want the taste of rub,” says Curry. “I prefer plain old salt and pepper.”
Goldwyn recommends one-half teaspoon kosher salt (or a quarter-teaspoon table salt) per pound of ribs. And rather than using a store-bought rub (most of which contain salt and will throw off your seasoning ratio), come up with your own or look up a simple recipe that doesn’t contain salt.
Let the seasoned ribs sit in the refrigerator for at least a few hours or up to overnight before cooking. “As the salt gets wet on the surface of the meat, it melts, causing an electrical charge,” Goldwyn notes. This charge causes the ions in the salt to penetrate deep into the meat, improving flavor.
Finish your ribs with a barbecue sauce, if you’d like. Store-bought sauces are fine — there are many good ones out there — but if you’d rather personalize your sauce, start by tweaking your favorite store-bought sauce to find out what flavors and nuances you like, then experiment with making your own. Just remember to sauce the ribs at the very end of cooking. If you sauce before the ribs are done, the sauce — and your ribs — will simply burn.
Wood flavor or smoke is always a nice touch but isn’t necessary. If you’d like, add a handful of chips (don’t soak beforehand) to the coals, replenishing as needed for the first hour or so. “You can get a really nice smoke ring in just 30 minutes,” says Goldwyn.
Test Kitchen director Noelle Carter shows you how to trim and clean your ribs like a pro.
While I may use the term “cooking” when I talk ribs, there’s no real difference between the terms “barbecue” or “grilling,” and you can use whatever term you like. “When people say there’s a difference between barbecue and grilling, they’re repeating or parroting what people have told them,” says Goldwyn. “It’s all barbecue. Get over the snobbery.”
When I cook at home, I usually start the ribs on a charcoal grill with wood chips to flavor the meat with smoke. I then tightly cover the ribs and finish them in a low oven until they’re done. Curry actually prefers to cook her ribs on her gas grill when she’s not competing.
One key to good ribs is a low cooking temperature. “If you cook ribs quickly or to a normal pork temperature of 140- or 145 degrees, they’re gonna be impossible to chew,” stresses Goldwyn. Over high heat, the proteins in the meat shrink and squeeze out moisture and the meat becomes dry. Cooking temperatures will range from 225 to 300 degrees or so. I like to keep the temperature right around 250 degrees.
If the temperature gets too high or your ribs get too hot, baste the rack using a mop or spray bottle. Water is fine or you could use a mixture including fruit juice, mustard or vinegar. Basting lowers the temperature of the ribs so they cook more slowly, keeping the meat tender.
Another key is cooking over indirect heat. If you’re working with charcoal, move the coals to one side of the grill so they’re not directly under the ribs. If using gas, fire up the burners away from the ribs.
If you think about it, your grill or smoker can function just like an oven. Invest in a good grill thermometer so you can keep track of the ambient temperature of the air directly above or alongside the meat (not in the meat) so you can regulate the temperature.
Cooking time will vary depending on temperature and the type of rack. Baby backs might take anywhere from three to five hours to cook completely, and for spare or country-cut ribs figure four to six hours. There are a few ways to test for doneness. Goldwyn recommends bending the meat: If the meat easily cracks as the rack is bent, it’s probably done. Curry uses a toothpick: Push a toothpick in between the bones and if there’s little to no resistance, they’re ready.
One pro tip is to wrap the ribs in foil before finishing them on the grill or in the oven. Also called a Texas Crutch, tightly wrapping the ribs in foil with a little liquid after smoking helps to keep the ribs moist as they cook, and can speed up cooking time.
A quick note on boiling ribs: Please don’t. While boiling ribs will shorten the cooking time and make the meat moist, the water will also leach out the flavor. “Water is a solvent, that’s why we wash our hands with it,” says Goldwyn. “Water will dissolve the flavor in the meat.” Boiling gives the ribs a mushy, spongy texture.
“I want my ribs to have the same texture as my steaks,” stresses Goldwyn. “I don’t mind if I have to chew them a little.”
CHIMNEY: For real flavor, nothing beats cooking over charcoal — that is, as long as that great charcoal flavor isn’t ruined by the taste of lighter fluid. For a quick, surefire way to light charcoal without having to douse the hardwood or briquettes with lighter fluid, try a charcoal chimney starter. It’s simple to use: Crumple some newspaper and stuff it in the bottom of the chimney, then place the charcoal on top. Light the newspaper, and in 15 to 20 minutes your coals will be ready for their moment. About $15.
RIB RACK: If you’re cooking more than one rack at a time, or have a small grill or smoker, consider investing in a rib rack, which holds the racks up vertically so they take up less valuable real estate on the grill. Look for racks that leave ample room between each slot so the heat and smoke have plenty of room to circulate around each rack. $12 to $20.
TONGS: Put the fork away. A good set of tongs will give you a much better grip on whatever you’re grilling, and you won’t have to repeatedly puncture what you’re cooking. When looking for tongs, reach for a pair of spring-loaded or flexible bent tongs as opposed to a pair joined by a swivel pin (similar to scissors or pliers), as they offer more control. And consider size. Tongs range from as short as 6 inches to well over a foot in length. The shorter the tongs, the more control you will have. $5 to $10.
BASTING BRUSH/MOP: A basting brush looks similar to a paint brush, and you can find a sturdy silicone one at most supermarkets. A barbecue mop looks like a miniature old-fashioned floor mop and is great when you’re basting a lot of meat at once. Prices vary by type and material, but generally run $5 to 15.
SPRAY BOTTLE: This is also an easy way to coat your ribs with an extra layer of moisture. And unlike a brush or mop, which can wipe away rub if you’re a little too forceful, a bottle evenly coats your racks with whatever you’re using as a baste. Fill the bottle with a very thin baste, such as water or juice, so the liquid doesn’t clog the nozzle. Spray bottles filled with water will also help to tame flare-ups. About $3.
THERMOMETER: The little thermometers that often come stamped into the lid when you buy the grill aren’t always reliable. For better control, keep tabs on the internal temperature of the grill using a thermometer specifically made for the barbecue, or a digital thermometer with a probe that you can place next to the food. $30 and up.
GRILL BRUSH: Spare yourself the expensive grill cleaning supplies and chemicals; a basic grill brush is all you need to keep your grill and racks in working order. Simply heat the grill on high after cooking to char any stuck foods and sauces, then run the brush over the mess to clean it off. $5 to $10.
Prepare the ribs: Peel the membrane from the back of each rack of ribs. Rinse the ribs under cold water and pat dry with paper towels.
Season the ribs with salt, using ½ teaspoon kosher salt for each pound of ribs. After rubbing the salt evenly over the ribs, season each rack with rub, rubbing about 2 tablespoons evenly over each rack. Refrigerate the racks until ready to smoke, up to several hours.
Meanwhile, prepare your smoker or grill to cook over low, indirect heat. Set up a drip pan underneath where the ribs will smoke, and fill with water. Shortly before cooking, adjust the heat as needed to maintain a temperature around 250 degrees, and add hickory chips to start smoking. Meanwhile, prepare your baste: In a bowl, whisk together the vinegar, water and mustard.
Place a rib rack over the drip pan and slide the ribs onto the racks. Adjust the heat as needed (add several coals to either side of the grill as needed if using a kettle grill) to maintain the ambient temperature (about 250 degrees). Replenish the chips as needed to keep smoking. Baste the ribs every 30 minutes or so to keep it moist.
After about 1 1/2 hours, baste the ribs once more. Wrap the ribs tightly in foil and continue to cook over indirect heat (about 250 degrees) until the meat is just tender (a toothpick slid into the meat between the bones should penetrate easily, and the meat will crack as the rack is bent), 2 to 3 additional hours (time may vary depending on the size of the smoker and how well the heat is regulated). The ribs can also be finished in the oven: Place the basted ribs in a roasting pan tightly covered with foil and cook in a 250-degree oven until tender, 2 to 3 hours.
Uncover the racks and and lightly coat them with barbecue sauce. Place the ribs directly over the coals or a hot grill and cook until the sauce is aromatic and begins to darken, about 5 minutes. Watch the ribs to make sure the sauce does not burn.
Get our Cooking newsletter
Get a taste of Los Angeles — and the world — with recipes and kitchen tricks from the L.A. Times’ Cooking newsletter.
You may occasionally receive promotional content from the Los Angeles Times.

