Perfumed nectarine jam
- Share via
And so now I’m reading that jam-making has become a favored pastime of the culinary adventurers. That’s great -- there are few things that make breakfast sweeter than spooning homemade preserves onto a piece of toast. But I can’t help wondering how long this boom will last once we get into the really thick heat of summer. Standing and stirring a big pot of boiling fruit will take the starch out of even the most enthusiastic cook.
Not to worry, I’ve got a solution -- you just need to think small.
The problem with most jam-making instructions is that they are not intended for you and me. They’re artifacts of a time when jam-making was a necessity, not a pleasure. If you’re a farm wife who has to put up the fruit from three or four trees, then recipes that call for 5 or 10 pounds of peaches and a really big vat to cook them in make sense.
But that’s not why most of us make jam these days. We buy fruit from the farmers market or supermarket, and we get only a couple of pounds at a time. We make jam because it tastes so good. And because it’s fun.
You may find yourself gasping at that last remark if you’ve ever spent a hot summer night sweating over a big batch of peach preserves (I remember one 120-degree evening at Mas Masumoto’s orchard outside Fresno doing just that).
But there’s a better way. I learned the secret of making small batches of jam years ago from my dear friend Sylvia Thompson, a terrific cookbook writer.
Here’s how the technique goes: Cut up the fruit and weigh it. Add an equal weight of sugar. Bring it to a boil on top of the stove and then let it sit overnight to macerate. The next day, finish the jam a couple of cups at a time in a nonstick skillet. Cooked over medium-high heat, it’ll set in less than five minutes.
That’s all there is to it. Last weekend I turned 2 pounds of nectarines into jam in less than 30 minutes of total work. What’s more, because I couldn’t figure out what sounded best as an accent flavoring -- lemon verbena, rose geranium or basil -- I made one batch of each. (For what it’s worth, I’m still undecided: All of them are delicious. Obviously, more testing and tasting are required.)
--
A fresher flavor
Because the fruit cooks more quickly in small amounts, the flavor of the jam stays fresher. You also use less sugar than commercial jams, so the flavor is more about the fruit than the sweet (instead of 50% sugar by weight, commercial products must contain more than 55% sugar just to legally be called jam).
This technique uses no additional pectin, which results in a slightly softer, more natural set, and it’s easier to tell when you have reached the proper moment of setting when you’re stirring a skillet with only a couple of cups, rather than a pot of several quarts.
Cooking jam in small amounts also leads to greater spontaneity -- you can indulge a whim rather than having to plan jam-making as a daylong project. And when you’re cooking this way, you can feel free to experiment, combining different fruits or flavors.
Finally, because you’re making jam in such small quantities, you can simply refrigerate it rather than going through the canning process necessary for storing in the pantry.
I’ve been making jam this way for many years now, but even the most tried-and-true recipes can hold a surprise or two. This year’s “learning moment” came from a mistake (as so many do). The first batch I made this summer, I weighed the nectarines before pitting rather than after and the result was way too sweet.
This surprised me because it doesn’t seem as though pits should weigh enough to throw off the equation by that much. But then I wondered: If the addition of that small amount of extra sugar can make that big a difference in flavor, what if I went the other way and tried using less sugar?
To find out, I made three batches of nectarine jam (see, I told you it allowed spontaneity), and instead of using half sugar by weight, I used 45%, 40% and 35% (for non-math majors, that works out to two, 1 3/4 and 1 1/2 cups of sugar per pound of cut-up fruit).
Surprisingly, all three worked, though the cooking time and the final set was slightly different for each. The less sugar you use, the softer the jam will be and the longer it will take to set.
With equal weights fruit and sugar, the nectarine jam sets up about like a high-quality commercial product (not eraser-stiff, but mounding nicely in a spoon). By the time I got to 35% sugar, the final set was softer and slightly flowing -- certainly not like a syrup, but more like an old-fashioned “spoon sweet.”
Also, beyond a certain point I found that reducing the sugar didn’t improve the flavor that much. To my taste, the 45% batch made with 2 cups of sugar was just about the perfect balance of fruit flavor and sweetness. (For what it’s worth, when Chris Kimball of Cook’s Illustrated tested the technique, he got successful sets with as little as 1 1/4 cups of sugar -- 30% by weight.)
--
A stirring sensation
How do you know when the jam has set? First, you’ll feel it. While stirring the jam, you’ll feel the texture change from light and liquid to heavier and smoother.
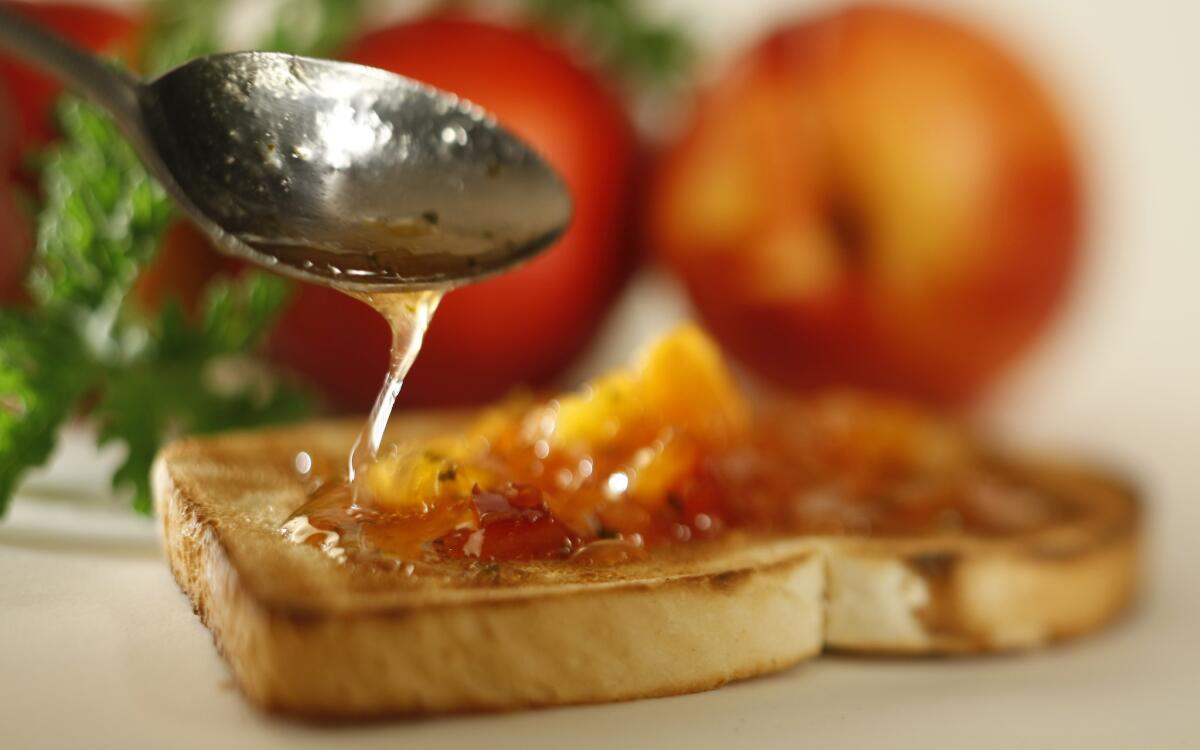
But the surest way is by watching the way the jam falls from the stirring spoon. When you first start cooking the jam, it will come off in one stream, like water. When it’s almost ready, it’ll fall off in multiple streams, but still slightly liquid. Cook it an additional 30 seconds or so and you’ll notice that a sheet begins to form at the base of the spoon. That’s the moment.
Remove the jam immediately from the heat and pour it into the storage containers. If you taste now (Careful! It’s blistering hot), you’ll find that the texture will have a slight cooked-sugar stickiness and the jam will seem too loose. Chill it for a couple of hours and you’ll see that it will have set up perfectly and the stickiness will be gone.
Because different fruits contain different amounts of pectin, you may need to play around a bit. I’ve used this technique successfully for peaches, plums and nectarines and for strawberries.
Furthermore, with almost all jams, you’re better off using fruit that is slightly under-ripe rather than over (ignore those signs that proclaim “ideal for canning”). Under-ripe fruit is higher in pectin and, while it may be a little lower in sugar, that’s not really a problem with jam, is it? When I’m sorting fruit to make jam, I usually set any truly ripe fruit aside to make pie.
Just last night I found we had an unexpected surplus of blackberries for breakfast (both my wife and I had bought them on separate runs to Trader Joe’s ... does that ever happen to you?). I took a pound of them, heated them with sugar and let them sit. This morning I made a couple of cups of jam.
Although those berries can be a little bland raw, when cooked with sugar and a bit of lemon juice, a much fuller, more nuanced flavor comes through.
Good, but I can’t help thinking about adding a little slivered fresh ginger to it. Or maybe mixing up blackberries and raspberries. Boy, wouldn’t that rose geranium be good?
Give me a minute and we’ll find out.
In a large, heavy-bottom pot, stir together the nectarines and sugar until thoroughly combined. Warm over medium heat, stirring occasionally, until the mixture is liquid and flowing. Bring the mixture to a full boil, stirring occasionally to keep from sticking. Remove the pan from the heat, stir in the lemon juice and set aside for at least 8 hours to give the fruit time to macerate. If you’re going to leave it for more than a day, refrigerate after 8 hours.
When you’re ready to finish the jam, ladle two to two-and-a-half cups of fruit and syrup into a nonstick skillet and place over medium-high heat. Add the lemon verbena and cook, stirring constantly, until the mixture falls from the side of a spoon or spatula in sheets, or until a drop of the mixture spooned onto an ice cold plate gels and is firm, about 3 to 5 minutes (add 2 to 3 minutes if the mixture has been refrigerated).
Spoon the mixture into a container and refrigerate until ready to use. If you prefer to can traditionally, you can follow the instructions from the jar manufacturer.
Repeat with remaining fruit and syrup.
Get our Cooking newsletter
Get a taste of Los Angeles — and the world — with recipes and kitchen tricks from the L.A. Times’ Cooking newsletter.
You may occasionally receive promotional content from the Los Angeles Times.


